domingo, 24 de febrero de 2008

ScrapBook Part 2

A little more stuff you may need to know baby


Buying your scrapbook


Purchasing a scrapbook is an individual decision. There are many factors to consider when choosing an album.

Page size- the most common page sizes are 8 1/2 by 11 and 12 by 12.

Binding type- the most popular choices are post bound, ringed binders and strap hinge- these albums all allow for pages to be added or removed. Spiral bound albums limit your ability to add or remove pages.

Cost- The cost of scrapbook albums varies widely. Safe albums can be purchased from $10 or less to over $100, with most albums averaging about $35 to $40.

Ease of use- Every scrapbooker has a different opinion on the type of album that they find easiest to use. Many scrapbookers like 3 ring binders because it is so easy to insert and remove pages. Post bound and strap-hinged albums are popular but are a little more time consuming to insert and remove pages. Many scrapbookers like the ease of use that a top loading system provides, in addition to 3 ring binders, you can use Creative Memories albums as a top loading system by using Portrait Page refills and there are post bound albums that are top loading, like the Close to My Heart album.


How to Create Your First Scrapbook Page

Here's How:

1. Select 6-10 photos of one event, for example Christmas, Halloween, Family Vacation, or a Birthday Party.
2. Choose the best of these photos to include on your page (all of them may be included) removing those that are out of focus, too far away etc.
3. Crop the photos as desired, trimming away unneeded elements and creating fun shapes (see link below for help).
4. Create a sample layout by laying the pictures on the page in a pleasing design. Continue experimenting with the layout until it pleases you.
5. Use a pencil to lightly trace the outline of your pictures when you have them in the "perfect" places on the page. Set the photos aside.
6. Select one color of acid-free photo mounting paper that accents the colors in your photos.
7. Cut 2 triangles (approximately 5 3/4 x 5 3/4 x 8 1/4 inches) from your photo mounting paper.
8. Place the triangles in opposite corners of your page on top and bottom, affixing with mounting tape.
9. Replace the photos, affixing with mounting tape, and erasing the traced lines just before adhering each photo to the page.
10. Consider adding a title to the page with either acid-free permanent pens or sticker letters (see link below).
11. Journal below and/or around the photos, remembering to include Who was there, What you were doing, When it took place, Where were you, Why were you there, and How everyone was feeling or what you were thinking.
12. Add a few acid-free stickers to give color to your layout and continue the theme of the page (for example: candles, a cake, balloons, and/or party hats for a birthday page).
13. Slip on a page protector to keep your completed page safe from dirt, dust, spills, and fingerprints.
14. Admire your first completed page showing it off to friends and family.
15. Start thinking about your next page.

Tips:

1. For your first page, keep it simple.
2. Don't think about the 18 boxes of pictures under your bed, just focus on the page at hand.
3. Most of all, have fun, relax, and try not to get frustrated or overwhelmed.


How to Get Started Journaling in Your Scrapbook

Simple steps to help you get started journaling in your scrapbooks which is the key to preserving your memories.

Difficulty Level: Easy Time Required: Varies

Here's How:

1. Choose acid-free, permanent, scrapbook pens in colors that coordinate with your scrapbook page.
2. Begin by adding a title to the page. You can keep it simple; it could just include the event and date, i.e. "Easter 1998."
3. Next, start with the basics, especially dates and full names. Write this information under or around your photos.
4. Continue by adding some basic circumstantial information, such as where the events in the photos took place, or why the people in the pictures were there.
5. If you have room on your page, you can complete your journaling by adding some personal thoughts, emotions, poems, or quotes. If you are having trouble, keep it simple, for example, "Everyone was heard to say that they had a great time at the party."

Tips:

1. Your personal handwriting adds another element of history to your albums (even if you don't especially care for it). However, if you can't bring yourself to write in your albums try printing the journaling on acid-free paper from your computer and mount it on your pages.
2. Try fun things on occasion like adding sticker pictographs to your journaling to jazz it up.
3. Lastly, remember that your family's story is the most important part of preserving the past and the present for the future, don't neglect it with too few words.

Add Journaling - Personalize your page by writing down names, date, and place of event, as well as memories or quotes from some of the people involved. Called journaling, this is probably the most important step when creating a heritage scrapbook. For each photo or set of related photos, you should follow the five Ws - 1) who (who are the people in the photo), when (when was the photo taken), where (where was the photo taken), why (why is the moment significant), and what (what are the people doing in the photo). When journaling, be sure to use a waterproof, fade resistant, permanent, quick drying pen - preferably black as research has shown that black ink best stands the test of time. Other colors can be used for adding decoration, or other non-essential information. Heritage Tip - When journaling in your heritage scrapbooking, it is important to be specific, adding related memories and details to the names and dates


Scrap Book

Well today im making this post for my wife. Its about something she founds very interesting.

Scrapbooking is the practice of combining photos, memorabilia and stories in a scrapbook style album. Scrapbooking has been around as long as there have been photos, but the scrapbooking that has evolved in the 90's is new and different. As we learn more about color photographs, we are better able to store them in a manner that will preserve them. Scrapbookers in the 90's are taking advantage of the scientific knowledge available in the area of photo preservation to ensure that their precious photos are not just in a scrapbook, but that they are in a scrapbook that will help protect them from deterioration. Because of this, future generations may be spared the yellowed, faded color photos of their childhood that many of us now own. The sad fact is that color photographs are NOT permanent, however, the methods that we use to store color photographs can length or reduce their life-span significantly.

Scrapbookers of the 90's have also embraced scrapbooking as a creative outlet. New scrapbooking techniques, ideas and products are in great demand. These demands have spawned many new scrapbooking related businesses. In just a few short years scrapbooking has become a $200 million dollar a year business.

The future of scrapbooking will undoubtedly bring many "electronic" scrapbookers into the field of scrapbooking. The hardware to take digital photographs, the ability to transfer photos to disk and the software to manipulate photographs have amazing capabilities. The electronic scrapbook may ultimately be the only truly permanent scrapbook and so you will find information on this medium here also.

Just Beginning to Make a Scrapbook? These tips might help.

A photo album just shows you the photos but a scrapbook tells the story. A scrapbook can contain photos, mementos, notes about the event and by the page's look and feel, it can depict a 'mood'.

What's the Best Way to Organize Photos?photocollection.gif (49126 bytes) If you have a lot of older photos you'd like to make into scrapbooks: Start by organizing your photos: Do you have drawers or boxes of photos to organize or to remove from old 'magnetic' albums? It might be best for you to divide the photos into themes rather than try to go back and make chronological scrapbooks covering years and years.
Good organizational themes are: All our Christmases All our Vacations All our Moves Family Reunions howtothemes.gif (16418 bytes)

Making a scrapbook of each theme is a good idea because you can put them together fairly rapidly--each page doesn't need to be totally unique, in fact you want continuity. It will save you time and money using the same colors of background paper, for instance, and maybe for Christmas alternate red and green backgrounds to depict changing years. Do a 'cover page' for each year or event and keep it simple and bold--maybe one photo and the date and location. If all your 'cover pages' are similarly styled, there will be a nice continuity throughout.

photoenvelopes.gif (25774 bytes) Themed books are easy and enjoyable to look at and they show how children grow and styles and fashions change over the years. Even visitors to your home will enjoy flipping thru albums of this type whereas they would get bogged down on a chronological album showing all the minute details of life. You can have color copies of your themed scrapbooks made so you can give each child his/her own copy.

Do you have a new baby, child or business you'd like to start a scrapbook for? It is fun to look back and see how a business or hobby grows over the years. Adding lots of text or 'journaling' as it is called in scrapbook circles really adds to the fun & meaning later. It is a good idea to start a scrapbook for each young child so you can pass it on to them and let them continue it themselves when they are old enough.

photoalbumsizes.gif (31318 bytes) What Kind of Scrapbook Should I use?

Although there are all sorts of scrapbooks in various sizes on the market, things in the general seem to have settled into two 'camps', the 12 x 12 inch books, and the 8 1/2 x 11 inch format. Official scrapbooking paper comes in those two sizes. I find that everything in the 12 x 12 format is a good bit more expensive. It is true that you can easily get more photos on this larger page size, but to me the disadvantages outweigh the advantages.

The 8 x 11 inch format works best for me because:

What is all the ACID FREE, ARCHIVAL buzz about? The acid present in certain papers will cause the paper to break down & get brittle and can cause deterioration of your photos touching the paper. I'm sure you have seen the old timey black paged scrapbook whose pages have turned powdery and brittle and crack when you turn the page. This is what you want to avoid. It just makes sense to choose products that will last rather than ones you know won't. That said, I will now say that in light of the fact that nothing on this earth lasts FOREVER (except the Word of God), I am not a fanatic about worrying if every little sticker or ticket stub is archival. We all have examples of scraps of paper and mementos that are way old and cause no problems and hang in there pretty well. Use your own judgment about deciding what products to use, keeping in mind that some companies are fanatical about this issue, but they also are the ones who want you to buy THEIR archival products.

What is all this talk of CROPPING? howtophotocrops.gif (27742 bytes)

Cropping a photo is simply cutting off the boring, messy, or distracting parts of a photo. Generally photos look best with straight sides and clean edges, like a square or rectangle. There are times when an oval or a circle shape is a great choice. You can also cut along the edges of an object or person and remove the background altogether. Or cut a portion of the object out leaving the rest of the photo intact. This can result in sort of a jack-in-the-box effect. It really is important to use a tool to help you cut your straight sided photos in perfect 90 degree angles. There are numerous small inexpensive paper cutters to do this job. Cutting a photo with fancy edged scissors is usually not a great idea. It looks best to cut the photo with smooth edges and use the fancy scissors on a colored paper mat around the photo.

Why MAT the photos? howtophotosmatted.gif (35746 bytes)

By having a narrow edge of colored paper around the outside edges of your photos, you can 'bring out' a certain color in the photo. This enhances the visual impact of the photo. You can use more than one color mat at a time. You can also off-set a mat in creative ways. Lots of people cut the mat with fancy scissors to give a distinctive cut edge that ties in with the over all design of the page. To me the simplest way is to glue the photo to the backing paper and just trim around the photo freehand leaving about 1/8 inch of paper all around. With a little practice you can do this quickly. If it is a big photo, I might put glue around the outside edges of the photo and cut out the middle of the mat to save or use elsewhere on the scrapbook page. Sam's Club and similar stores sell huge packages of acid-free construction paper for cheap that are bright colors and handy for matting photos. What about PAGE PROTECTORS? Generally it is a good idea to slide your finished pages into page protectors in your scrapbook. You can get archival ones for a great price at Sam's Club, etc. I like the crystal clear ones alot better than the non-glare ones. Since your pages will be constructed of various cut papers and attached photos, etc, I find I can use a lot less glue when I know the page will be in a plastic protector in the scrapbook. What about GLUE? There are all sorts of special glues on the market. You can spend a lot on fancy adhesives. I like plain old acid-free twist up glue sticks. They are cheap and I can buy them by the dozen at Sam's Club or office supply places. Occasionally I will use a small glue applicator like the ones Fiskers makes when I am gluing cut out letters or very small items. Just don't use rubber cement. It turns brown over time. You just want to use a glue that will not cause your paper to buckle, so you want a glue with no water in it.

Now, I do want to add that in climates with very high humidity I'd not use the twist up glue sticks. Recently I had a crafts project where I used this type of glue on the Gulf Coast which has almost 100% humidity most of the time--and the glue turned gummy and let go--even though it was months after the project was completed. So in areas of high humidity, I'd use the Zig glue pen with is more of a rubber cement type of glue but is made for scrapbooking.
viernes, 22 de febrero de 2008

Caminatas Espaciales

Desde que en 1965 Alexei Leonov saltara al exterior de la Voskhod 2 sujeto por un cable, el hombre se ha paseado en innumerables ocasiones por el espacio. Según la lista de Wikipedia, el número de caminatas espaciales supera ya las 250, protagonizadas por 158 astronautas diferentes. Ya sea enganchados al brazo del trasbordador o provistos de dispositivos de propulsión, estos hombres y mujeres se han jugado la vida y han dejado para la historia algunas de las imágenes más bellas jamás imaginadas. Éste es un breve resumen de los más memorables paseos espaciales: 1. Alexey Leonov, el pionero (marzo 1965) El 18 de marzo de 1965 el cosmonauta ruso Alexei Leonov se convirtió en el primer ser humano en realizar una caminata espacial tras salir al exterior de la Voskhod 2 y permanecer allí durante doce largos minutos. Justo al final de su paseo, Leonov comprobó horrorizado que su traje espacial se había inflado considerablemente como consecuencia del vacío y que no podía reentrar a la cabina. Afortunadamente, el cosmonauta pudo abrir una válvula que le permitió descomprimir el traje in extremis y regresar a la cápsula. Las imágenes de aquel primer paseo siguen resultando impactantes. (Seguir leyendo) (In English) 2. Ed White, primer estadounidense (junio 1965) El 3 de junio de 1965, a bordo de la misión Gemini 4, Edgard H. White se convirtió en el primer astronauta norteamericano en pasear por el espacio. Durante la caminata, que duró 22 minutos, White estaba unido con la nave mediante un cordón dorado de 7,6 metros de largo que le suministraba oxígeno para respirar. 3. Bruce McCandless, el paseo más largo (1984) El 7 de febrero de 1984, el astronauta Bruce McCandless realizó una de las hazañas humanas más escalofriantes de la Historia al separarse del transbordador Challenger a una distancia de 100 metros. Provisto de una unidad propulsora MMU, McCandless realizó el primer paseo espacial sin fijación a la nave y flotó libremente en el espacio durante varios minutos. El sistema de propulsión por chorros de nitrógeno acoplado a su espalda le permitía desplazarse libremente en el vacío. Su espectacular paseo sigue siendo el más largo y peligroso hasta la fecha. [1] 4. Mark C. Lee, probando nuevo dispositivo de rescate (1994) Diez años después, en 1994, el astronauta Mark Lee pondría a prueba un nuevo dispositivo de propulsión espacial más seguro, el Simplified Aid for EVA Rescue (SAFER), pensado para el rescate de los astronautas en caso de emergencia. En la fotografía, Lee se impulsa a varios metros del Discovery sobrevolando la Tierra a unos 200 kilómetros de altura. [1] 5. Paseos en el espacio profundo (1971,72) El 5 de agosto de 1971, mientras el Apolo XV regresaba a la Tierra y a una distancia de 275,000 km, el astronauta Alfred Worden salió al espacio exterior durante 41 minutos, en la caminata más distante de nuestro planeta jamás realizada. En la fotografía, el astronauta Ronald Evans realiza una caminata espacial durante el regreso del Apollo XVII, en diciembre de 1972. Evans hizo tres salidas de este tipo, la tres últimas caminatas en el espacio profundo que se han ralizado hasta la fecha. [1] [2] 6. Primer paseo espacial en un transbordador (1983) El primer paseo por el espacio del programa Shuttle fue llevado a cabo por los astronautas Musgrave y Peterson en abril de 1983, con una duración de cuatro horas. Durante la caminata, ambos probaron los nuevos trajes y el sistema de compresión del trasbordador. [1] 7. Rescate del satélite Intelsat VI (1992) En mayo de 1992 los astronautas Richard J. Hieb, Thomas D. Akers y Pierre J. Thuot realizaron una de las misiones más arriesgadas de la NASA al capturar en órbita el satélite Imntelsat VI de 4,5 toneladas. Como se aprecia en la fotografía, los astronautas realizaron la operación "a seis manos". [1] 8. 'Excursiones' sobre el brazo robótico Más allá de los dispositivos de propulsión, la forma más segura para salir al espacio ha sido la utilización del brazo mecánico de los trasbordadores. Acoplados sobre un brazo de 15 metros de largo, los astronautas pueden moverse de un extremo a otro de la nave con mayor seguridad. El Sistema de Manipulación Remota (RMS), fue diseñado por la compañía canadiense Spar Aerospace por lo que se le conoce como Canadarm. Estos son algunos de los momentos más espectaculares:
Jerry L. Ross enganchado al RMS del trasbordador al Atlantis. [1] Mark C. Lee y Carl Meade sobre el Discovery, 1994. [1] Stephen K. Robinson, misión Discovery, 8 de agosto de 2005. [1] Wisoff y Low sobre la cubierta del Endeavour, diciembre de 1993. [1] Michael Gernhardt enganchado a uno de los brazos del Endeavour. [1] Peter J.K. Wisoff sobre el brazo robótico, diciembre de 2003. [1] David Wolf prueba el dispositivo EVARM para medir la radiación,10 de octubre de 2002. [1] Bruce McCandless "surfeando" sobre el Canadarm, febrero de 1984. [1]
Satélite en venta El 14 de noviembre de 1984 el astronauta Dale A. Gardner se fotografió con este cartel de "For Sale" ("Se vende") haciendo una pequeña broma sobre los dos satélites, Palapa B-2 y Westar 6, que sus compañeros y él tuvieron que recuperar tras graves problemas. [1] 9. Trabajos en el Hubble Desde su lanzamiento, el telescopio Hubble ha recibido varias visitas de los astronautas para corregir diversos errores de funcionamiento e instalar equipo adicional. Debido al rozamiento con la atmósfera, el telescopio va perdiendo velocidad muy lentamente, de modo que cada vez que es visitado los astronautas deben empujarlo a una órbita ligeramente más alta. [1] [2] En la imagen, el astronauta F. Story Musgrave, anclado al RMS se prepara para subir al Hubble e instalar cubiertas protectoras. Hasta hoy ha habido cuatro misiones de mantenimiento del Hubble. La quinta se ha pospuesto hasta 2008. 10. Trabajos sobre la Estación Espacial Internacional (ISS) Desde el comienzo de construcción, en 1998, la Estación Espacial Internacional ha sido objeto de los trabajos más difíciles y arriesgados de los astronautas. En la imagen superior, Robert Curbeam y Christer Fuglesang trabajan en la estación mientras ésta sobrevuela Nueva Zelanda (diciembre 2006). [1] Arriba, el astronauta Jerry L. Ross utiliza el Canadarm2, el brazo robótico de la estación, para la instalación de nuevas piezas en los módulos. La estación se mueve en una órbita baja a una velocidad descomunal, unos 27.000 kilómetros por hora. Sobre estas líneas, Piers Sellers trabajando sobre la cubierta de la ISS. Abajo, dos vídeos de los astronautas sobre la estación mientras viajan a toda velocidad sobre la Tierra. Las imágenes resultan hipnóticas.
En junio de este mismo año los astronautas del trasbordador Atlantis completaron la última caminata espacial hasta la fecha, con una duración de más de seis horas. Durante una de las salidas, la astronauta estadounidense de origen indio, Suni Williams (que estableció un récord femenino de permanencia ininterrumpida en el espacio) protagonizó una curiosa anécdota al ver cómo una de sus cámaras fotográficas se desenganchaba de su equipo y se perdía en el vacío. Las imágenes quedaron registradas en vídeo:

jueves, 21 de febrero de 2008

Cuando darle de comer solidos a un BEBE?

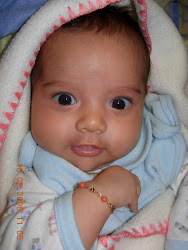
Pues de acuerdo a diversas fuentes la mejor edad parece ser a los 4 meses, mi bebe de 3 meses por primera vez comió hoy plátano, vamos a ver como le cae. Por supuesto que esta recomendación nos las dio el medico. Yo ya había pensado que le haría bien, ya que últimamente comía demasiado demasiadas veces al día. El día de mañana le vamos a dar juguitos a ver que tal nos va ;)

El crecimiento de los bebes

En esta página encontre los diagramas de crecimiento para BEBEs y niños publicado smas recientemente por la OMS, es importante saber que fueron creados tomando en cuenta varios grupos etnicos, y de ahi sacaron unb promedio.